Following up to our previous installment, we will now walk you through how to set up your Icy Dock with the Microsoft XBOX 360.
Previously, the XBOX 360 did not allow users to use an external HDD with media to be played through the system. However, with recent updates for the XBOX 360, users now have many different options for playing media. And with the expensive, yet restrictive hard drives developed by Microsoft for specific use on the XBOX 360, users have been on a constant search for the best solution.
Using an Icy Dock to expand your media center experience via the XBOX 360 allows you to have almost unlimited storage capacities for movies, photos, and music. Simply drag and drop your media into an Icy Dock, and plug it into the XBOX 360 with a USB interface. What this installation guide will show you is how to correctly format the drive for use with the console.
Items you will need
*XBOX 360 (internet connection required for possible media updates)
*Icy Dock Enclosure using a USB interface
*Hard Drive or Solid State Drive for use in the Icy Dock
*PC or Mac
*Movies, Picture, and Music for playback on XBOX 360
Step 1: Format The Drive
*The drive needs to be formatted in FAT32 (MS-DOS File System) for it to be recognized by the XBOX 360.
*Windows Users – Windows can only format drives in FAT32 up to 32GB. To format it to its full capacity, you will need to use a program called Swissknife (
http://www.compuapps.com/download/Swissknife/swissknife.htm) or use the command line method from the PS3 guide.
*Mac Users – Open up Disk Utility, and format the disk using MS-DOS.
*Formatting the drive will cause all data on the drive to be lost. Back up anything important before proceeding with the Formatting.
Step 2: Put Media On The Drive
*Since the XBOX 360 is essentially a computer, it will recognize the folder format of your drive. The easiest way to organize your media is Video, Music, and Photos.
*There is no need to re-organize folders within the main folders. For example, a folder holding all your TV shows can be left alone. The music folder organizing all albums or artists can be left alone. The picture photo organizing all photo albums or collections of photos can be left alone.
*Supported video formats
-MP4, AVI (some do not work), WMV, MOV
-The XBOX will display a file with a line through it if it is not playable.
Step 3: Connect The Drive To Your XBOX 360
*Connect the USB cable to the front or rear USB port. If you are using a using a 2.5” drive in the Icy Dock, the power from the USB will be enough to power the drive. All 3.5” applications will require the power supply.
*Go to the Video, Picture, or Music library, and search for your Icy Dock, listed as a portable device.
*Select your drive, browse, and enjoy!
SOFTWARE
*Free and effective open source programs for converting video
-Windows: Media Encoder (
http://mediacoder.sourceforge.net/download.htm)
-Mac: FFMPEGX (
http://homepage.mac.com/major4/download.html)
SUGGESTED ICY DOCK PRODUCTS
*
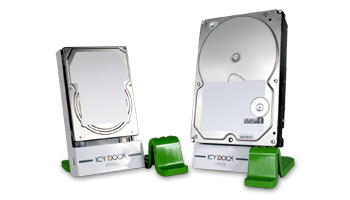
MB881US-1S -Fits all 2.5/3.5’’ SATA HDD and SSD
-eSATA and USB interface
-2.5” drive powered by USB when plugged into XBOX 360
*
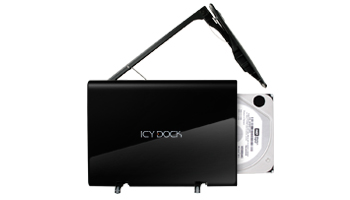
MB559 Series -Fits all standard 3.5” drives, and 2.5” drives using the MB882SP-1S converter
-eSATA/USB, USB/FIREWIRE400, USB/FIREWIRE800 available
-Available in black, white, and mirror black
-Utilizes are tray system. Spare trays also available.

*MB664 Series
-Fits all standard 3.5” drives, and 2.5” drives using the MB882SP-1S converter
-eSATA/USB, USB/FIREWIRE400, USB/FIREWIRE800 available
-Available in black, white, and mirror black
-Screwless design
*
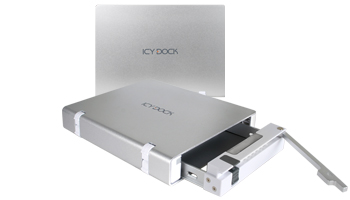
MB663UB Series-Fits all standard 2.5” SATA HDD and SSD
-Built in USB male plug
-Powered XBOX 360 via USB
-Available in silver and black
Labels: external, format, guide, hard drive, hdd, icy dock, media, music, ssd, storage, video, xbox, xbox 360